Docs
Everything You Need to Know
Widgets
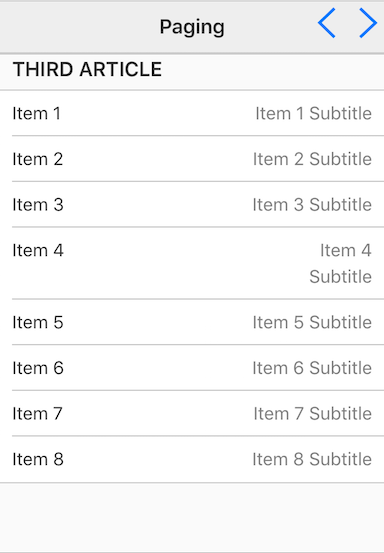
Pagination
Sometimes you want to give the user a way to quickly scan through a number of screens quickly, but not really move to other screens. ChocolateChip-UI provides a paging widget for this. It uses some particular markup. Instead of screen, it uses article tags inside a screen's section tag.
Importing UIPaging Into Your Project
In order to make a pagination control, you'll need to import the UIPaging class class into your project. You do that by by including the following at the top of your app.js file in your project's dev folder:
import {UIPaging} from './src/widgets/ui-paging'
After importing UIPaging, you are ready to create a pagination control.
<ui-screen id="paging" class='current'>
  <nav>
    <h1>Paging</h1>
  </nav>
  <section class='paging'></section>
</ui-screen>
To initialize the paging control we use the new UIPaging(options)) method and provide the options you want. The options are:
- screen - the ui-screen where the paging widget will be rendered
- data - the data you pagging widget will consume
- size - a value for how to chunk the data for paging
- template - a function that returns a template literal to be used for chunks of data
The paging widget depends on a special method: $.chunk. This function takes an array and a chunk size and breaks the data up into an array of arrays matching the size. For this to work you need to import the $.chunk method in your app.js file like this:
// First import "chunk" from utils:
import  './src/utils/chunk'
import {UIPaging} from './src/widgets/ui-paging'
Let's take this one at a time.
- You need to let the paging widget know what ui-screen you want to render the widget in. So you give it the id of the ui-screen.
- Next you need to tell the widget what data to use. This will be an array of data, raw JavaScript data. This could be an array of 100 or 1,000 items. It doesn't matter.
- In order to divide up the data in chunks that can be paged, you need to tell the widget how many items a chunk should contain. If your array holds objects, you might only want one object per page, or 3 or 10. It depends on how much screen the page will take up on a mobile device. You will probably have to experiment a bit to find what works. Remember, the whole point of using a paging widget is to prevent the user from having to scroll down a really long list. So, use a size value that works to this advantage.
- Lastly, you define a template for your pages. This works the same way as template methods used by components.
Below is an example of setting up a paging widget. We are breaking our array of data into chunks of 6 items each. We are passing our array of data to the template with the parameter "chunks". Then we use mpa to create an article tag for each chunk of 6 items. While iterating we check to make sure the first chunk gets rendered with the class current. We then use map on each iteration to output the individual chunk items inside the article tag.
const paging = new UIPaging({
  screen: '#paging',
  data: pagingData,
  size: 6,
  render: (chunks) => html`
    ${chunks.map((chunk, idx) => html`
      <article  class="${idx === 0 ? 'current' : 'next'}">
        <br>
        <h2>Section ${idx + 1}</h2>
        <ul class='list'>
          ${chunk.map(item => `<li>${item}</li>`)}
        </ul>
      </article>`)
    }`
})
Check out the file "paging.html" in the examples folder. Read the following instructions for getting the examples.
Pagination Example
See the Pen Paging V5 by Robert Biggs (@rbiggs) on CodePen.
Pagination with Android Theme
See the Pen Paging Android Theme V5 by Robert Biggs (@rbiggs) on CodePen.