Docs
Everything You Need to Know
Widgets
Segmented Button
Importing UISegmented Into Your Project
In order to make a segmented button, you'll need to import the UISegmented class class into your project. You do that by by including the following at the top of your app.js file in your project's dev folder:
import {UISegmented} from './src/widgets/ui-segmented'
After importing UISegmented, you are ready to create a segmented button.
Segmented buttons are useful to provide the user several possible actions from one interface control. The can also be used to toggle the visibility of panels of content. To create a segemented button control you need to have a container for them. This is usually a div with the classes "horizontal centered". We will inject the segmented buttons in this:
<div id='segmentedPanel' class='horizontal centered'></div>
With our container ready, we can initialize the control:
const segCtrl = new UISegmented({
element: '#segmentedPanel',
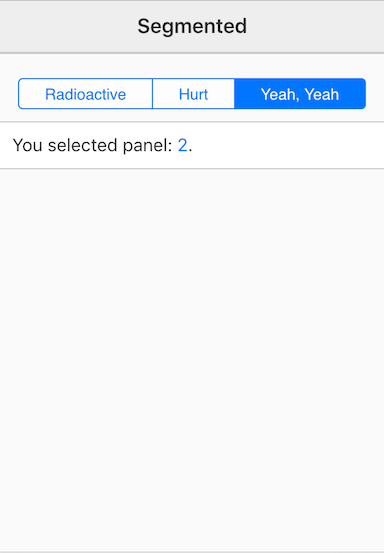
labels : ['Radioactive','Hurt','Yeah, Yeah'],
selected: 2,
callback: segmentedResponse
})
In the above example notice that we provide the id of the container as the value of element. Then we provide labels that the buttons will display. We set a default selected state, which is a zero-based number. And finally, a callback to execute when the user taps a segment. That's all there is to set up a segmented control. Please see the file "segmented-button.html" in the folder of examples in the source code from Github.
You can capture an instance of a segmented button control so that you can find out what its current selection is. To do this, assign the control to a variable. When you create an instance in this way, you can find out what the current selection is with the index property of the segemented instance. This is a zero-based index of the seclection. You can also get the currently selected button throu the instance's button property. In the following example, we assign the control to segCtrl and then execute segCtrl.val().index to output the current selected button, and we use segCtrl.val().element to get the text of the button:
const segCtrl = new UISegmented({
  element: '#segmentedPanel',
  labels : ['Radioactive','Hurt','Yeah, Yeah'],
  selected: 2,
  callback: () => {
    e.stopPropagation();
    // Output the numeric value of the selection:
    $('.attentionGrabber').text(segCtrl.val().index + 1);
    // Output the text value of the button selected:
    $('.content').text(segCtrl.val().element.text());
  }
})
Read the following instructions for getting the examples.
Segmented Button Example
See the Pen Segmented Button V5 by Robert Biggs (@rbiggs) on CodePen.
Segmented Button with Android Theme
See the Pen Segmented Button Android Theme V5 by Robert Biggs (@rbiggs) on CodePen.